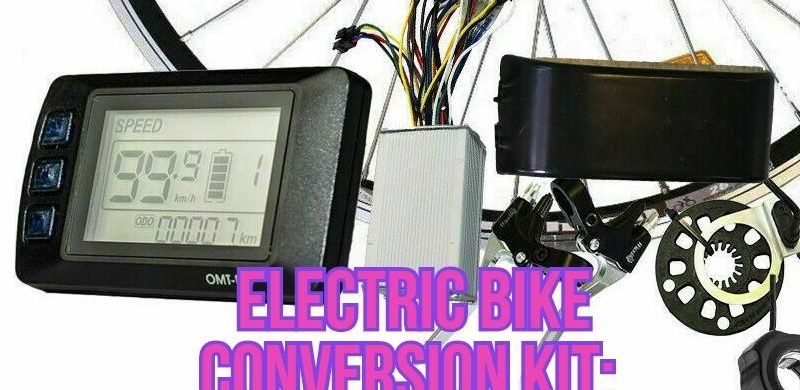
Electric bike conversion kits are an incredible upgrade to the older pedal-powered, manual models. For many Australians, the switch from fossil driven vehicles has become all the important in 2020.
The magnitude of devastation caused by the Australian bushfires as well as the onslaught of the Coronavirus pandemic in Australia and many other countries around the world reveal the necessity of changes to the way we live, work and play.
For Aussies everywhere who feel a great commitment to their old manual bikes, and seek to enjoy the sentiment and nostalgia for a long time to come, electric bike kits are a great way to adapt them to the realities of the new world. The section below provides a basic, easy to use the outline of the key steps for electric bike conversion.
Electric Bike Conversion Kit: Installation steps
Choose your batteries
Electric bike’s function by drawing stored power from their batteries into the electric motor which generates the motile force which ensures that you can get from one place to the other without pedalling vigorously. If you’re non-technical, this process can quickly get overwhelming. This is because there are a large number of cells, manufacturers, and engineering specifications to sort through.
The first thing to do is to figure out what the acceptable range of voltage is for the electric motor you’ve purchased. Once you have this information, ensure that your battery falls within this range and you’re up one step already. Look out for the voltage and capacity when you make a battery purchase as these variables determine how much value your bike will provide.
Choose your e-bike conversion kit
Once you have your batteries sorted, you’ll need an electric bike conversion kit. Most e-bike conversion kits come with accessories such as; levers, displays, and other important components that allow your bike to function electronically. With these, you need to consider what your battery can take, which wheel has the motor and what size of the electric bike conversion kit is appropriate for your wheel.
While there are many similarities between the models you’ll find as you choose an option, if you’re a light user, a 250W electric bike conversion kit will do just fine. If however, you live in Sydney, Hobart, or any other hilly parts, you might want to consider a 700-1000W e-bike conversion kit as it provides more power for navigation in difficult terrains.
Where will your e-bike motor go?
As far as decisions go, you’ll need to decide where your motor will go. If you’re going with a less complicated 250-350W installation, the front-wheel motor is perfect for you. This is because most suspension forks are not designed to accommodate high pressure on the front wheels even though they’re an infinitely easier fix compared to e-bike conversion kits with a rear-wheel motor.
DAS-KIT E-BIKE FRONT MOTOR CONVERSION KIT, 36V 250W WITH L6 DISPLAY 20″
On the other hand, if your bike comes with a 750W – 1000W motor, as well as a steel or aluminium frame, then an electric bike conversion kit with a rear-wheel motor will do just fine.
27.5″ DAS-KIT E-BIKE CONVERSION KIT, 36V 250W, DAS-KIT X15 REAR MOTOR, L6-DISPLAY, FOR FREEWHEEL
Putting it together?
At this point, you’re probably content to be done with all the think-work and looking forward to getting your hands dirty. The first step is to remove the front or rear wheel depending on where the hub will go. All you need to do is loosen the brake cable and the quick release lever in that order.

Switch the wheel from the kit with your old one, use a washer to prevent the free-wheel from creating friction. Install the new wheel using all the appropriate washers on the freewheel as well as on the other side to prevent any accidents during use. Also, as you run the electrical wires across the frame of your new hybrid, you’ll need to secure them with a zip tie to prevent damage and loss.
Completing the installation
All that’s left of the process is the LCD installation. First, remove the existing throttle and brakes and mount the LCD on the handlebars alongside the new e-brakes and throttle.

Depending on the electric bike conversion kit, you need to install the controls for the display as well as the cruise control and speed shifter. Also, ensure that no cables are leaning out of the frame, connect all the necessary cables and re-install your handlebar grips. Finally, enjoy your ride.
Conclusion
As you make the incredible decision to upgrade your old manual bike, make sure to collect as much information as you can about such things as the battery, motor and other key components of the e-bike conversion kit. If you’ve done a good job of buying the correct components for the upgrade, the actual installation process can be a breeze or mildly annoying process depending on how inclined you are to mechanical and electrical installations.
Most retailers offer on-site installation if you prefer not to dabble and if you do, you can use blog posts such as this and others that cover the process in greater detail as a guide as you embark on this incredible adventure.


